
If, for whatever ungodly reason, you wanted to use Angular to build UI for an Electron app and was wondering how to start with that, you have come to the rigth place.
Most, if not all, of the tutorials out there have one thing in common: they are out of date and don't work even if you go back in time. Ok, that's two things. Also, the ones that I found that kind of, sort of work are actually a small frameworks built around Angular and Electron that basically require you to learn yet another unnecessary thing: that project's structure and architecture, that mini-framework the author put together, just to be able to start working on Angular/Electron combo.
I'll' have none of that. This will be all-manual setup with minimum code needed to have things working. It will be super generic. If you want to automate all these steps, to write a little tool to do it all, do it yourself, because in order to do so you have to make certain decisions (i.e. how the project is structured) which some, or most, of your audience may not want to be bound by.
So, roll up your sleeves, get your best shovel, and let's start cultivating some herbs.
To start, I'll use specific major versions for main packages because I'd like this guide to be reproducible today as well as in not so distant future. Another thing will be using the least amount of tools and tricks as possible, but not too minimal, since there are some cool little tricks I'd like to advantage of this writeup, to present here too.
We will be using Angular 21 and Electron 41. NodeJS used in the background is version 24, and npm is version 11, so you need to have NodeJS installed on your system before you start. Version should not be critical, as long as it's 22 and up. Also, make sure you have git installed and configured.
There will be no major additional libraries/frameworks, like for example Angular Material. If you want to, you can add those, and anything else, just how you would do it in any other Angular (if it's an Angular related thingie) or Electron (if it's an Electron thingie) project.
Also, all the commands will assume you are on a Linux box. If you are on a Mac, you probably won't have to change anything, and if you are on Windows one option is to use WSL.
Install Angular CLI
First order of business: install Angular CLI.
What no one mentions for this step is that this step is ONLY needed so we can create a new Angular project. Once you create a project, you don't need (and actually you never need to use) the global Angular CLI to work on that project specifically.
Usually you do this by doing a global install with:
$ npm install -g @angular/cliHOWEVER.
I want to use a specific version of Angular here and don't want to sentence you to use that particular version on your entire system (because it's installed globally). There are multiple ways to get around poisoning your global system space with crapton of tools and utilities, and I am going to use the hackiest one. Because.
First, create a folder, you can call it however you want, I'll call mine angular-cli-21:
$ mkdir angular-cli-21Next, create a default package.json inside that folder:
$ cd angular-cli-21
$ npm init -y
And last, install Angular CLI locally, in that folder:
$ npm i @angular/cli@21Notice @21 in there, we are using Angular major version 21. Once installed, we make sure it's working fine with:
$ npx ng --version
21.2.8
Notice the use of npx. Using this nodejs tool ensures that we are running local version of whichever command we installed locally. If you have Angular CLI installed globally then you would just run ng --version, no npx needed.
OK. Make note of the full path for the angular-cli-21 folder, we'll need it for the next step. Mine is /home/user/.local/bin/angular-cli-21.
Create Angular project
First, we decide on our app name: we will call it angular-electron-app. That will also be the name of the folder where we create the entire project.
Angular CLI is finnicky when it gets to creating an Angular project in a sense that it wants to have a project folder all for itself. It does not want to play with other children, i.e. creating a new project will probably fail if you wanted to place that project into an existing folder that already has stuff in it. That is why we first have to create the Angular portion of our Angular/Electron project.
Once we are past this first step, you can add non-Angular things to the project later, just not before this very first step.
Open terminal, or cd to the folder where you want your project to be created, and run ng new like so:
$ npm --prefix=/full/path/to/angular-cli-21 exec -- \
  ng new angular-electron-app \
  --commit=true \
  --skip-git=false \
  --routing=true \
  --style=scss \
  --ai-config=none \
  --ssr=false \
  --zoneless=true
Make sure to replace the /full/path/to/angular-cli-21 with a proper full path to where you did that local installation of Angular CLI. For me it was /home/user/.local/bin/angular-cli-21.
If you decided to have a gloabl installation of the Angular CLI (via npm i -g @angular/cli@21), then you can skip the first line from the above command, i.e. run it like this:
$ ng new angular-electron-app \
  --commit=true \
  --skip-git=false \
  --routing=true \
  --style=scss \
  --ai-config=none \
  --ssr=false \
  --zoneless=true
Whatever is the case, you will probably have noticed that I made a bunch of decisions for you, regarding this project setup, with that command line above. I did that just to illustrate how you can skip all the questions during creation of a new Angular project by using a bunch of command line options. List of all the options for ng new CLI command can be found at its documentation page.
You can run interactive session by only specifying the project name, like so:
$ npm --prefix=/full/path/to/angular-cli-21 exec -- \
  npx ng new angular-electron-app
or, for global CLI installation:
$ ng new angular-electron-appand make your choices there.
In any case, once the project creation is done, we can move to the projects folder and keep working there:
$ cd angular-electron-appAs a side note, if you open package.json you will notice that, among other things, you have Angular CLI available local to your project:
[snip]
  "devDependencies": {
    "@angular/build": "^21.2.8",
    "@angular/cli": "^21.2.8",
[snip]
Check that we can build the project:
$ npm run build

> angular-electron-app@0.0.0 build
> ng build
[snip]
and once the build is done, you should have a dist folder in there with contents similar to this:
$ tree dist
dist
└── angular-electron-app
    ├── 3rdpartylicenses.txt
    ├── browser
    │   ├── favicon.ico
    │   ├── index.html
    │   ├── main-4SBLJFFF.js
    │   ├── polyfills-DOYHMSTV.js
    │   └── styles-5INURTSO.css
    └── prerendered-routes.json

3 directories, 7 files
We have our initial Angular part of the app, the next step:
Add Electron to the project
First thing we'll do is install Electron to our project:
$ npm i electron@41We already have the basic UI (Angular) part of our app in place, the next thing is to add some basic code for our Electron part.
Since Angular uses TypeScript, I wanted to do the same thing for the code we are going to write on Electron side of our app. There are a number of ways you could set up TypeScript to do this. What we are going to do here is we'll use the Angular tooling to do TypeScript compilation. Now, there certainly are simpler ways to set up TypeScript compilation for an Electron app, this way, however, will take advantage of all the things like packaging, tree shaking, minimizing, and all that, being already set up by the Angular tooling on one hand, and on the other hand I wanted to illustrate how you can add custom build targets to your Angular project, which can be useful for things other than Electron side of our app. Also, we can use some features of Angular builders, like file replacements, to have different build variants i.e. for development, testing, staging and production, for both our Angular (front end) and Electron (back end) parts.
OK, roll up your sleeves, we need to do a number of things here.
First, create a dedicated folder where we are going to keep source files for our Electron side. This folder should NOT be placed under already existing src, one reason being that live reload during development might be messed up, because there is a difference how Angular and Electron sides are live reloaded when source files change.
Alongside src folder, meaning in the project root, I'll create a folder called electron-src, not the nicest name, but it works for now:
$ mkdir electron-srcWe will add to that folder two ubiquitus files you can always find when it comes to working with Electron apps: main.js and preload.js, except in our case they will be named main.ts and preload.ts. You can actually name these two however you want, but we'll stick to the unwritten standard.
First, let's create main.ts and configure all the supporting tooling around it.
Create Electron's main.ts
Create main.ts file in electron-src folder like so:
$ cat <<EOF > electron-src/main.ts
import { app, BrowserWindow } from "electron";
import path from "path";

const createWindow = () => {
  // Create the browser window.
  const mainWindow = new BrowserWindow({
    width: 1024,
    height: 768,
    webPreferences: {
      preload: path.join(__dirname, "preload.js"),
      // Renderer process can't call Node side and we use context isolation.
      // We instead use https://www.electronjs.org/docs/api/context-bridge to expose Node-based API
      // which can then be called in src/services/remote service implementations
      // through globals defined via contextBridge
      nodeIntegration: false,
      contextIsolation: true,
    },
  });

  // Load the dist folder from Angular.
  mainWindow.loadFile(path.join(__dirname, "angular-electron-app/browser/index.html"));

  // Open the DevTools.
  // We can make this optional later, or even better,
  // ditch this line completely in production/staging build.
  mainWindow.webContents.openDevTools();
}

// This method will be called when Electron has finished
// initialization and is ready to create browser windows.
// Some APIs can only be used after this event occurs.
app.on("ready", () => {
  // call our function that creates window and stuff.
  createWindow();

  app.on("activate", function () {
    // On MacOS it's common to re-create a window in the app when the
    // dock icon is clicked and there are no other windows open.
    if( BrowserWindow.getAllWindows().length === 0 ) createWindow();
  });
});

// Quit when all windows are closed, except on MacOS. There, it's common
// for applications and their menu bar to stay active until the user quits
// explicitly with Cmd + Q.
app.on("window-all-closed", () => {
  if( process.platform !== "darwin" ) {
    app.quit();
  }
});
EOF
I'll continue to use terminal for almost all the commands in this article. You don't have to of course, you can use IDE of your choice to create these files and copy/paste content there.
The main.ts could be even more minimal than it already is, we could just ignore MacOS (a.k.a. darwin) handling and also ditch the webPreferences property in the new BrowserWindow call (you don't have to have preload.js to be able to run minimal Electron app), but I added all of those, with comments, because you will almost certainly have those in any decent Electron app.
We have our main.ts source, now we need to compile it into a JavaScript so that electron runtime can run it.
For this, as previously said, we will use Angular tooling, specifically a builder named @angular-devkit/build-angular and more specifically, its @angular-devkit/build-angular:server variant. For this, first we need to install the packages:
$ npm i -D @angular-devkit/build-angular@21
$ npm i @angular/platform-server@21
and then we need to add a build target for our main.ts file in the angular.json project (actually workspace, but it's fine) file.
This is how the angular.json file should look like at this point:
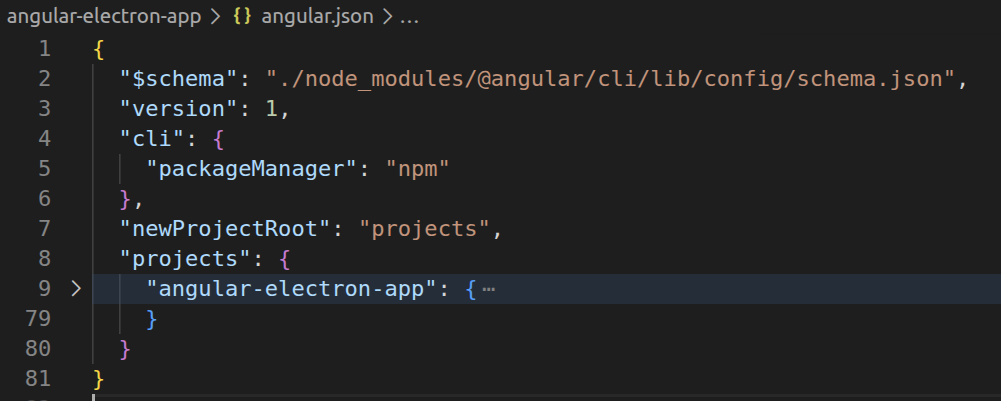
Notice that under the projects key we have only one project, our angular-electron-app. We will need to add our build targets under that project. If you have Angular workspace with multiple projects, make sure you add the targets under a correct project (the one that has Electron added to it).
Under the projects/angular-electron-app there is the architect property, which in our case has three options (or as I call them for the purpose of this article: "targets"): build, serve and test:
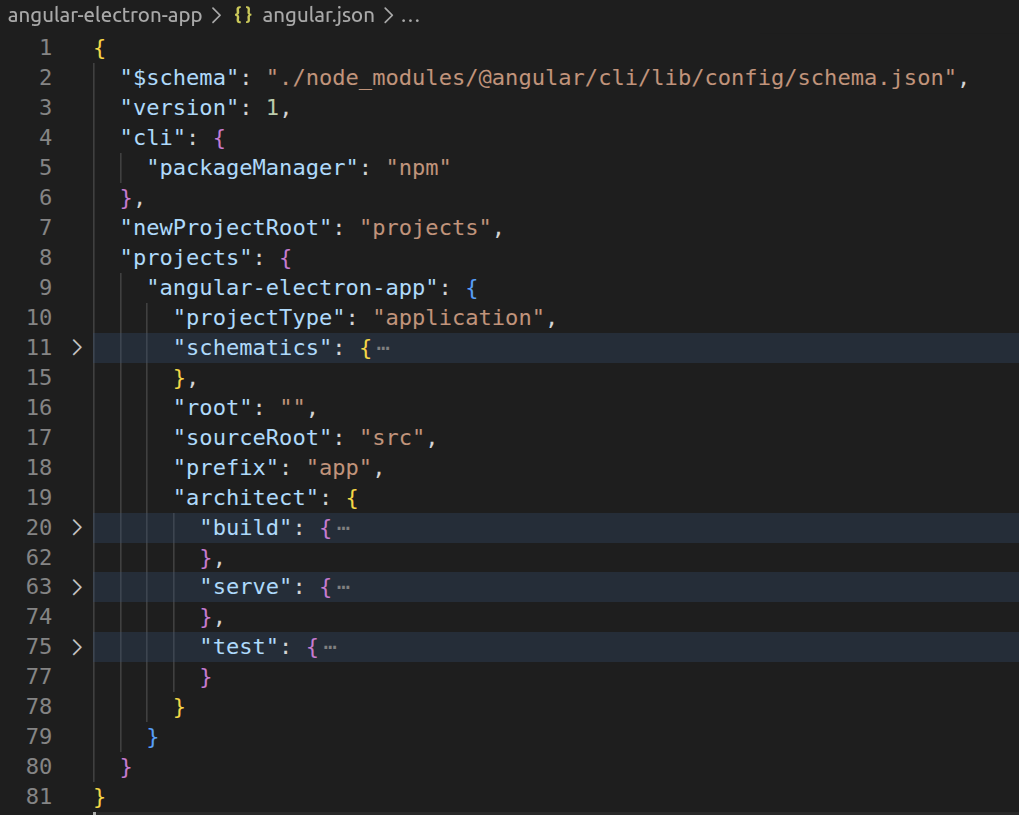
You have guessed it, these are configuration for ng build, ng serve and ng test commands.
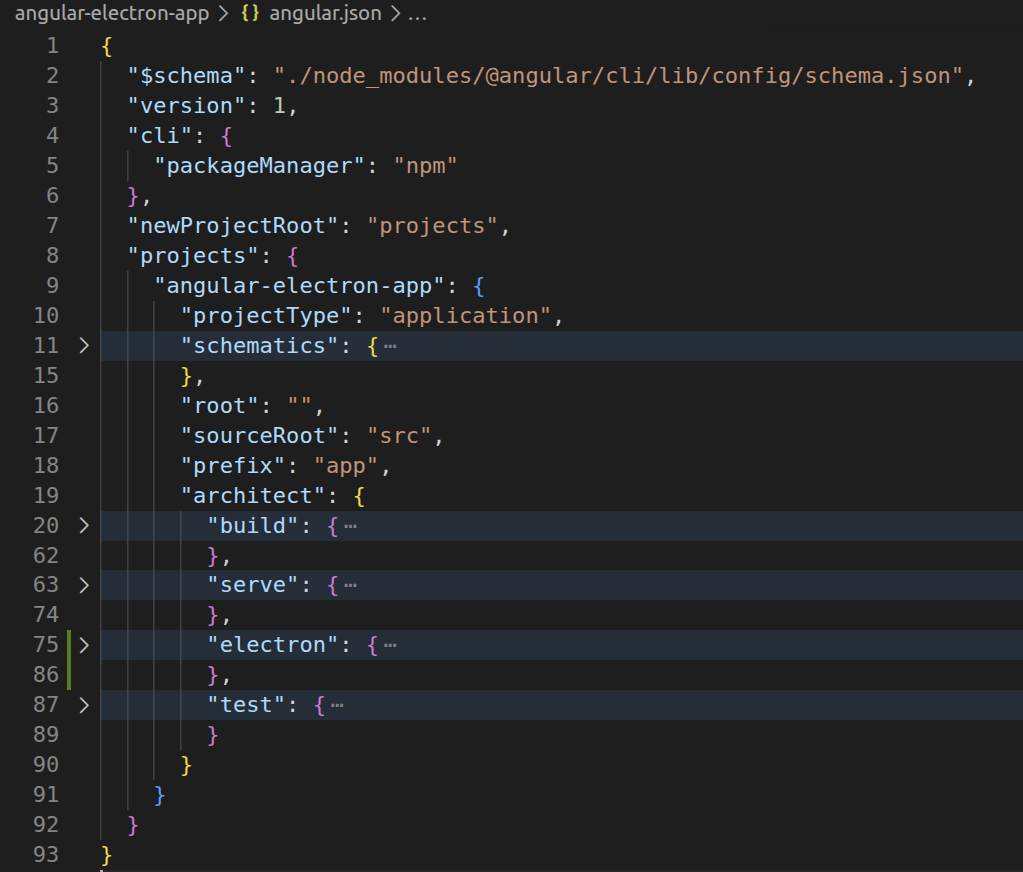
Let's add a target here to build our main.ts source and let's call the target (how else?) electron. Add this key-object under architect, i.e. after the serve key:
"electron": {
  "builder": "@angular-devkit/build-angular:server",
  "options": {
    "outputPath": "dist",
    "main": "electron-src/main.ts",
    "tsConfig": "tsconfig.el.json",
    "deleteOutputPath": false,
    "externalDependencies": [
      "electron"
    ]
  }
}
This is a minimal build configuration for our main.ts. One thing that is not required but is nice to have because it makes our developer's life way easier, is the deleteOutputPath property set to false. Without this, the dist folder would be deleted every time you run the electron build target which may become annoying when you have multiple build targets to run to compile your entire project.
We should now have our new electron target added to architects, and the angular.json file looking like so:
You may, or may not, have noticed that we are referencing a TypeScript config file called tsconfig.el.json via property tsConfig. There already is at least tsconfig.app.json file in your project, maybe tsconfig.spec.json too, and these are referenced by the build (explicitly) and test (implicitly, it's the default) targets.
Let's create our tsconfig file in project root:
$ cat <<EOF > tsconfig.el.json
{
  "extends": "./tsconfig.json",
  "compilerOptions": {
    "outDir": "./dist",
    "types": []
  },
  "files": [
    "electron-src/main.ts"
  ],
  "include": [
    "electron-src/**/*.d.ts"
  ]
}
EOF
We are only specifying output directory (dist) and under files we must have our electron-src/main.ts. The include part is not needed right now, but I added it to show how you should reference any TypeScript declaration files you may have under electron-src folder.
We are ready to compile our main.ts, but just before we do that, we should add our tsconfig.el.json under references property of the main tsconfig.json, like so:
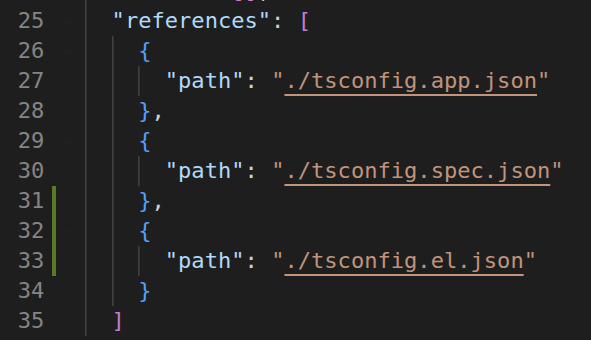
We don't technically need it in our simple case here, but you may want to (or have to) have it in more complex projects.
Now we have everything in place, we can build our Electron side main.ts file using the Angular builder we just set up for it:
$ npx ng run angular-electron-app:electronFor a better developer experience, let's add that command to our package.json scripts:
"build-electron": "ng run angular-electron-app:electron",so we can use:
npm run build-electronto build our main.ts.
Once the build is done, there should be a main.js file in the dist folder, and the dist folder looks something like this:
$ tree dist
dist
├── 327.js
├── 3rdpartylicenses.txt
├── angular-electron-app
│   ├── 3rdpartylicenses.txt
│   ├── browser
│   │   ├── favicon.ico
│   │   ├── index.html
│   │   ├── main-WW7BUZVO.js
│   │   └── styles-5INURTSO.css
│   └── prerendered-routes.json
└── main.js
We can't run our Electron app yet. I mean you can, but it will end up throwing errors at you.
Before we finally run our app for the first time, we need to:
Create Electron's preload.ts
Now, for our minimal Angular/Electron app, we can leave preload.ts empty, or just ditch it alltogether, but let's not do that right now, because we'll have to add it later to create a communication bridge between the Angular UI frontend and the Electron backend.
Create the preload.ts file with a silly command that zooms in the UI:
$ cat <<EOF > electron-src/preload.ts
import { webFrame } from 'electron';
webFrame.setZoomFactor(1.2);
EOF
and then we will also use an Angular builder to compile this file into JavaScript, which means doing similar steps as for the main.ts. This time however, we will not use the @angular-devkit/build-angular builder, we'll use @angular-builders/custom-webpack. You could also use this builder for main.ts. The main reason we are using the webpack Angular builder is because the @angular-devkit/build-angular will always output file as main.js and we want name for our preload.ts to be, well, preload.js. Also, this gives me an excuse to show how to use @angular-builders/custom-webpack.
So, let's install @angular-builders/custom-webpack first:
npm i -D @angular-builders/custom-webpack@21Once that's done, add a builder configuration for preload.ts to angular.json the same way we did for main.ts:
"electron-preload": {
  "builder": "@angular-builders/custom-webpack:server",
  "options": {
    "customWebpackConfig": {
      "path": "./webpack.config.elp.js",
      "mergeStrategies": {
        "module.rules": "prepend"
      }
    },
    "outputPath": "dist",
    "main": "electron-src/preload.ts",
    "tsConfig": "tsconfig.elp.json",
    "deleteOutputPath": false,
    "externalDependencies": [
      "electron"
    ]
  }
}
and call this one electron-preload. This is a minimal configuration for the builder. Notice that here we reference the electron-src/preload.ts file, and we also reference two more files: tsconfig.elp.json and webpack.config.elp.json. I used the elp here to reference Electron preload file, you change that to whatever else you like better, of course.
So, add those two files to the project root:
$ cat <<EOF > tsconfig.elp.json
{
  "extends": "./tsconfig.json",
  "compilerOptions": {
    "outDir": "./dist",
    "types": []
  },
  "files": [
    "electron-src/preload.ts"
  ],
  "include": [
    "electron-src/**/*.d.ts"
  ]
}
EOF
$ cat <<EOF > webpack.config.elp.js
module.exports = {
output: {
filename: 'preload.js',
},
};
EOFNotice how we specified output file name to be preload.js in the webpack config file. That is pretty much the only important reason why we used that builder for this case.
Don't forget to add tsconfig.elp.json to references of the tsconfig.json. Not required in our case, but nice to have for any future reference.
With all the bits in place, we can compile our preload.ts now:
$ npx ng run angular-electron-app:electron-preloadOf course, as before, making that into a package.json script will serve us better, so let's do that:
"build-preload": "ng run angular-electron-app:electron-preload",With that build done, the dist folder should now have all the file we need:
$ tree dist
dist
├── 327.js
├── 3rdpartylicenses.txt
├── angular-electron-app
│   ├── 3rdpartylicenses.txt
│   ├── browser
│   │   ├── favicon.ico
│   │   ├── index.html
│   │   ├── main-WW7BUZVO.js
│   │   └── styles-5INURTSO.css
│   └── prerendered-routes.json
├── main.js
└── preload.js

3 directories, 10 files
One thing remains before we run our Electron application for the first time:
Build Angular side with proper base href
Angular side of our application is a single page application which will be loaded by our Electron side from a local folder. This means that anything the Angular side needs to load, for example CSS files, JavaScript files, images etc. will be requested from the Electron side in a form of a URL (because Angular UI runs in a browser instance), and the Electron side will try to resolve that URL against local filesystem. What this practically means is that every time Angluar side requests an URL that starts with /, which ALL of them do, the Electron side will treat that as "hey, I want something from this location on the filesystem" and if a location starts with /, Electron interprets that as "let's look at our system disk, starting from the root". This won't work.
What we need to change is the format of URLs that Angular side sends to Electron side and the easiest way to do this is to fiddle with the HTML base element, which Angular includes in index.html by default. We simply need to tell Angular to use ./ instead of the default / and we'll be good. When Electron side receives URL that starts with ./ it will, as always, interpret it as "let's get this from local filesystem" except this time the URL starts with . which means "start looking from the current folder". And the current folder for Electron side is the folder where the index.html file is.
To do this, we'll run the Angular build like so:
$ npx ng build --base-href=./which will set the base element's href attribute just the way we need it to be. Of course, put that into a package.json script like so:
"build-angular": "ng build --base-href=./",and we are good to go. Once the Angular (re)build is done, now we can finally start our app for the first time using:
$ npx electron dist/main.jsRun that and you should see a window with content similar to this:
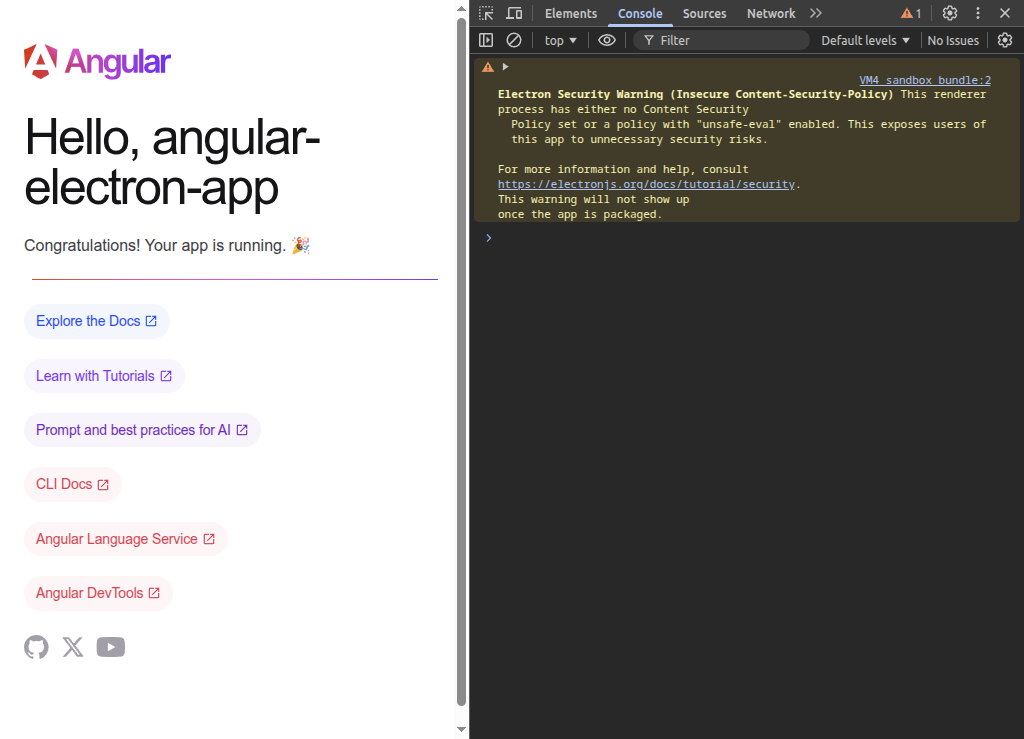
It's alive!!!
There are a few more things to address before we can call this a well rounded and usable article about creating an Angular/Electron application from scratch. Namely, we have to:
- mention, and show at least one, ways of communicating between Angular side and Electron side,
- discuss how to do live reload for both Angular and Electron sides when doing development, and
- at least mention how you can package and distrbute your app
Let's do that, and then wrap this puppy up.
Communication, how that?
Sending data back and forth betwen our UI frontend (Angular side) and the backend (Electron side) is very important, right? Right. There is a detailed guide on Electron documentation site about how to do this inter-process communication. You should probably at some point take a look at that. For the purposes of a quick start how-to article, we're doing an abridged version here.
So, there are three patterns of communication we can implement here, based on the direction in which information is flowing:
- One-way, Angular to Electron
- Two-way, Angular to Electron
- Electron to Angular
I will only implement here the pattern number two: two-way communication from Angular to Electron, and it will only be the simplest way of doing it, in the spirit of a how-to Internet article. One of the reasons for choosing this pattern, besides it being a two-way communication, is that it very much resembles what you would do in a standard web application: a browser running your web application sends request to your server, and the server replies back. So, it should be a familiar pattern if you are coming from web or full-stack development world (which you probably are).
The way this pattern works is that we need to create a communication point on the Angular side (in the Electron browser instance running our Angular UI) that looks like a JavaScript object which has functions we simply call and take return value from. This JavaScript object is attached to the window global variable in the browser instance running our Angular UI. So from Angular side we will send a request to Electron side by simply calling something like window.the_javascript_object.function_name( arguments ) and whatever the function returns will be the Electron side response to our request.
First, let's do the Electron side of this.
Communication on the Electron side
Step number one is to create that JavaScript object with all the functions on it that our Angular UI will use to communicate with the Electron side. We will create an object with just one "hello world" function, in a proper project there will of course be more functions there. Also, you can have more than one of these JavaScript objects created, and very likely you would have in any more complex application.
We create this JavaScript communication object in preload.ts, and in our case let's add this code at the top of our preload.ts:
import { contextBridge, ipcRenderer } from 'electron';

contextBridge.exposeInMainWorld( 'electronSide', {
  helloWorld: ( name: string, title: string ) => ipcRenderer.invoke( 'hello-world', name, title )
});
With this code we have created that JavaScript object as a variable called electronSide, which means we would access it as window.electronSide in the Angular code. The electronSide object has one function exposed called helloWorld and that function takes two arguments: name and title. The ipcRenderer.invoke part will do the actual work of communicating with the Electron side. In this case it will send name and title over to the Electron side using a channel of communication where the channel's name is hello-world. You can have as many arguments as you need, or none at all.
Now we need a piece of code that will do the actual work of whatever it is that helloWorld is doing. We implement that in main.ts.
There are two steps we need to do here:
- implement the
helloWorldfunction - create handler for the
hello-worldcommunication channel which will call thehelloWorldfunction implementation
First, the helloWorld function implementation, which we call electronSideHelloWorld, and it looks like this:
const electronSideHelloWorld = ( name: string, title: string ) : Promise<string> => {
  return Promise.resolve(`Hello ${title} ${name}!`);
}
The function accepts our helloWorld parameters name and title and returns the standard JavaScript Promise. You can use anything else that can unify with or convert to Promise, i.e. you could use RxJS.
Second, we write the code that creates handler for the hello-world communication channel, and it looks like this:
const initializeElectronSide = () => {
  ipcMain.handle( 'hello-world', async ( event: Electron.IpcMainInvokeEvent, ...args: any[] ) : Promise<any> => {
    return electronSideHelloWorld( args[0], args[1] );
  });
}
We call ipcMain.handle and give it name of our communication channel hello-world as the first argument, and then a lambda function as the second argument. This lambda function is the communication channel handler and all it does is it calls our electronSideHelloWorld passing it first two elements from the args array. The args array contains all the arguments you specify when calling the electronSide.helloWorld function from Angular side.
In this case the handler is an async function and as such it returns a Promise. The handler does not have to be an async function, in which case neither would our electronSideHelloWorld need to be, in this particular case. You could have:
- async handler returning call to an async function
- async handler returng a
Promisewith value from a call to a "regular" (not-async) function - "regular" (not-async) handler returning a value from a call to a "regular" (not-async) function
In our case both handler and electronSideHelloWorld are async, because usually you want to do a bit more work in your code than just concatenating strings, and for that we use async functions.
You can find more details on ipcMain in the Electron documentation.
Add both of these to main.ts at the top, i.e. like so:
import { app, BrowserWindow, ipcMain } from "electron";
import path from "path";

const electronSideHelloWorld = ( name: string, title: string ) : Promise<string> => {
  return Promise.resolve(`Hello ${title} ${name}!`);
}

const initializeElectronSide = () => {
  // https://www.electronjs.org/docs/latest/api/ipc-main
  ipcMain.handle( 'hello-world', async (event: Electron.IpcMainInvokeEvent, ...args: any[]) : Promise<any> => {
    return electronSideHelloWorld( args[0], args[1] );
  });
}

[snip]
making sure to improt the ipcMain, and then we need to call initializeElectronSide in our on("ready") handler, before creating the main window, i.e. like so:
app.on("ready", () => {
  // wire-up our two-way communication
  initializeElectronSide();
  // call our function that creates window and stuff.
  createWindow();

[snip]
In a real world application you would implement both electronSideHelloWorld and initializeElectronSide in its own TypeScript module(s), and then import initializeElectronSide into main.ts and call it the way we just did above.
That is the Electron side of our two-way communication done, let's do the Angular side.
Communication on the Angular side
This one is much simpler than the Electron side and mainly has two parts:
- declare all functions exposed with
contextBridge.exposeInMainWorldin yourpreload.ts - call the functions when you need to call them and consume whatever they return, if anything
We'll combine both of these steps directly into the app.ts which is where we will use the helloWorld function. First add the declaration to app.ts, right below its import lines:
[snip]
import { RouterOutlet } from '@angular/router';

declare global {
  interface Window {
    electronSide: {
      helloWorld: ( name : string, title : string ) => Promise<string>;
    }
  }
}

@Component({
[snip]
We are declaring to the TypeScript code here that the Window interface also contains this property named electronSide which is a javascript object that has one function helloWorld. With this, every time you write window.electronSide in you Angular code (in our specific case only in the app.ts), TypeScript will know what this is and be happy to compile it into JavaScript.
If you have exposed more functions under the electronSide in your preload.ts just add them to this declaration together with helloWorld.
Now, let's call this function from our Angular component defined in app.ts. For this, we will add a button to the app.html template, when we click on the button we will call the helloWorld function and then we will render its result back to app.html.
Let's start with app.html, relpace all its contents with this code:
<h1>{{ title() }}</h1>
<button (click)="sendMessage()">Call the Electron side</button>
<span>{{ message() }}</span>
One important note: since we are working with zoneless Angular (which is now preferred way), we need to use Angular signals to update template side bindings, in our case title and message. Because these are signals now we need to write title() and message(), i.e. use signals function call form. If you are up to date with Angular development you should already know this, and if not, now you know.
OK, now let's add the sendMessage() method and message signal to our app.ts, like so:
[snip]
export class App {
  protected readonly title = signal('angular-electron-app');
  message = signal('');
  async sendMessage() {
    this.message.set( await window.electronSide.helloWorld( 'Xavier', 'Professor' ) );
  }
}
The sendMessage() method simply calls window.electronSide.helloWorld() with fixed values and once the result is available, it sets the message to whatever it is.
And that is it, we're ready to:
Run the application (finally!!)
First, (re)build all the pieces (in any order you like):
$ npm run build-angular
$ npm run build-electron
$ npm run build-preload
This creates, with all the other things, dist/main.js file which is the main entry point for our Electron-based Angular app.
Run it with:
$ npx electron dist/main.jsand you should see an Electron app window with contents that look something like this:
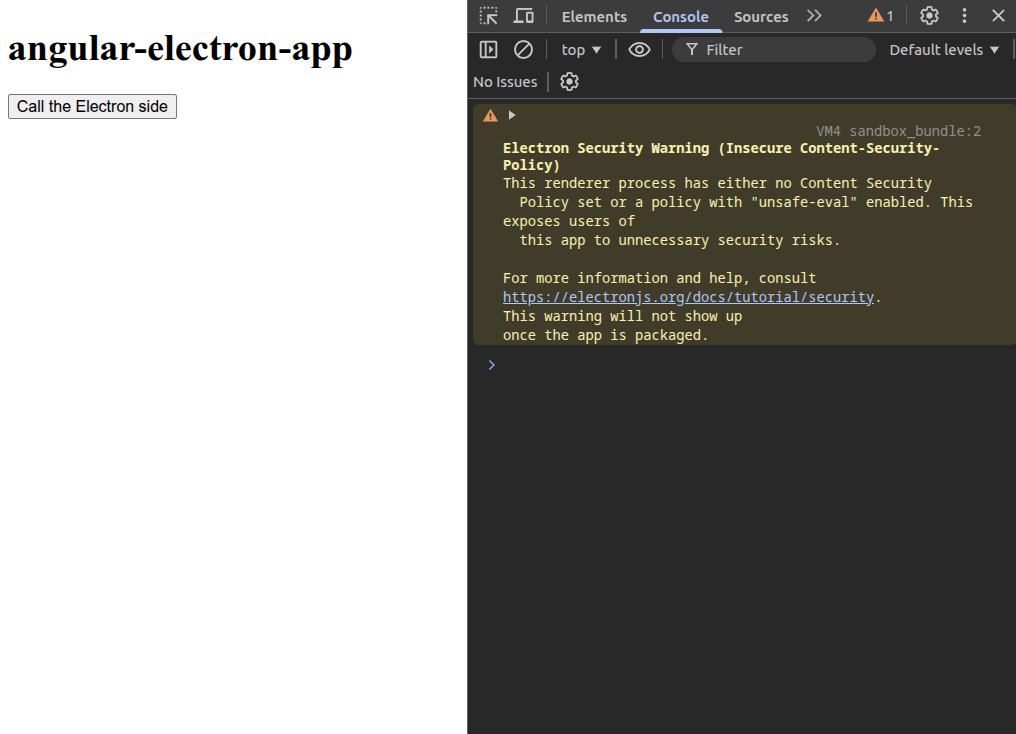
Click on the "Call the Electron side" button, and you should see the message that the Electron side sent to our Angular UI:

Yay!!
Of course, you should add a package.json script to run Electron, like so:
"electron": "electron dist/main.js",Also, you could add the main property to package.json, i.e. like so:
"main": "dist/main.js",and then you can run Electron like so:
"electron": "electron .",And that about concludes our journey. Now you have steps on how to get up-to-date Angular running in, and talking to, an Electron app.
I will just quickly mention two things: live reloading and packaging, and officially conclude this article.
Live reloading
There are two sides to live reloading when it comes to our little project setup, and yes, you guessed it correctly:
- Angular side
- Electron side
On Angular side, live reload is pretty simple: we will use the existing Angular ng serve command and then, instead of using a web browser as you usually would, we will tell our Electron side to load the UI not from the local file system, but from the http://localhost:4200 URL. Then, whenever you change something in the src folder which contains Angular code, Electron will reload the UI.
For this we need two terminals. We'll run the angular development server in one:
$ npm startand in the other we will run Electron as usual, except before we do that we need to add a small change to the Electron's main.ts. We will make it so that if we pass --serve flag to our electron app on command line, it will load UI from http://localhost:4200 and if the flag is not present it will load the UI as usual, from local file system.
First, add a very simple check for presence of the --serve flag, right below import lines:
const serve = process.argv.includes('--serve');and then, replace the mainWindow.loadFile ... line with this code:
if( serve ) {
  // Load the UI from Angular development server.
  mainWindow.loadURL("http://localhost:4200");
} else {
  // Load the dist folder from Angular.
  mainWindow.loadFile(path.join(__dirname, "angular-electron-app/browser/index.html"));
}
Then, rebuild the Electron main.ts with npm run build-electron and, in the second terminal, start the Electron app with:
$ npx electron dist/main.js --serveNow, if you for example change the title = signal('angular-electron-app'); line in app.ts to something else, i.e. title = signal('live-angular-electron-app'); and save the file, UI in the running app should reload and you should see the change.
Finally, add another script to package.json to run Electron with --serve flag:
"electron-serve": "electron dist/main.js --serve",and now you can run npm start in one terminal and npm run electron-serve in another and be able to see changes to your UI live in the running Electron app.
Doing live reloads on the Electron side is a bit finnicky and I will not go into details here. There is a number of ways to do that part, from manually closing/starting Electron app once you rebuild its source after you did changes to it, to using electron-reloader to do the job for you. electron-reloader kind of works, it is a bit finnicky in my experience, and also you have to keep in mind that we also need to transpile our main.ts to main.js first before electron-reloader can detect a change, so we'll leave that excersize for the reader.
Packaging
And finally, packaging and distributing your app!
I will be even terser here, no code or details at all because reasons, the main one being it could easily be an article for itself.
There are solutions out there you can look at, like @electron/packager or electron-builder, and of course, the Electron documentation itself about application packaging.
I'll leave you with one last tip: you can add an icon to your app that will show nicely on Linux, MacOS and Windows by adding icon option to the BrowserWindow we create in main.ts, like so:
[snip]
  const mainWindow = new BrowserWindow({
    icon: path.join(__dirname, 'angular-electron-app/browser/favicon.png'),
    width: 1024,
[snip]
Note that the favicon file is PNG, so you'd need to make one in that format, or for development purposes you can convert the Angular's default public/favicon.ico to favicon.png using one of many online icon converters or a tool you already have on your system, like the convert utility on Linux.
And that concludes our session for today.
Peace.